Showing posts with label tutorial. Show all posts

Tuesday, June 3, 2014

How To: easy clean up

Everyone knows what a mess a gradient or water marbling can be. My cuticles are very dry, so I try to avoid using too much nail polish remover on my skin. This post is about some great ideas of how to minimize your clean up.

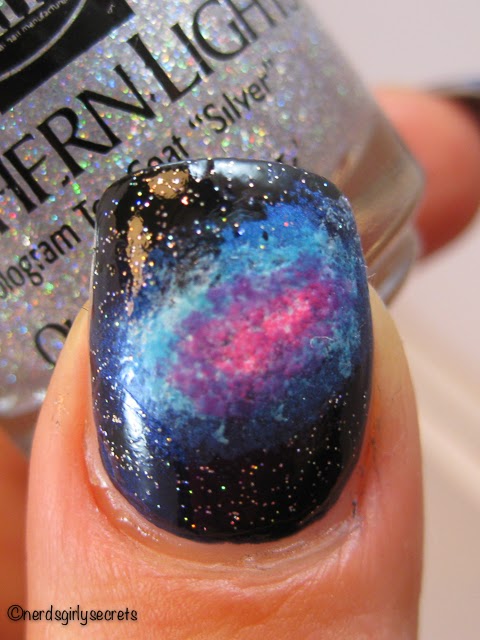
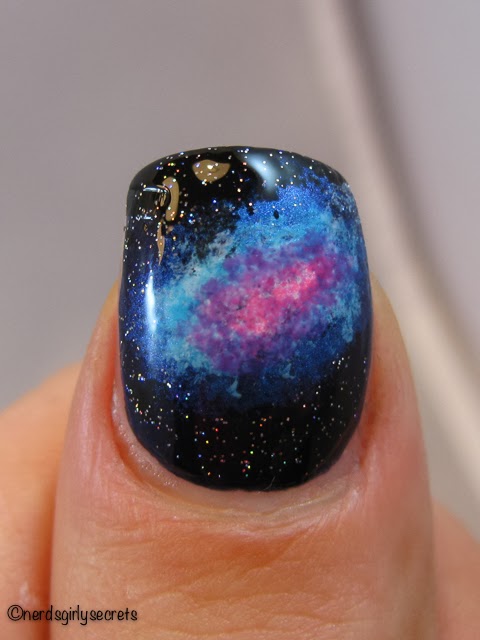
Easy gradients with masking fluid

Couple of moths ago I saw this genius trick: use masking fluid to protect your cuticles!
Masking fluid is a kind of liquid latex, used in watercolor painting to preserve areas of the painting you want to remain white. Once the fluid is dry, it has a waxy, rubbery surface and paint won't stick to it. Check out this youtube video to see how it works in watercolor.

Some fellow nail addicts use white PVC glue to protect the skin around the nails. Masking fluid has a similar effect, but it is water resistant - which is perfect, if you want to rinse your hands while your gradient is drying and you're not completely done yet.
Normally, I'd apply a thin coat of the masking fluid around my nails and let it dry. After I did my gradient, I'd just rub the layer off.
Masking fluid is also called frisket or liquid mask (Rubbelkrepp or Maskierflüssigkeit in German and маскировочная жидкость in Russian).


Tape: remove excess stamping 

Wacky Lacki posted this great tip for stamping cleanup. It works like a charm! If you're fast you can even remove stamping from your nail, if it didn't turn out well.
Check out the full tutorial by clicking on the pic:


Tape for water marbling

Taping your nails is very easy, but you cannot tape both hands at the same time - a no go for gradients. But it works perfectly for water marbling. My Simple Little Pleasures has a great tutorial on how to do it:


Do you have any tricks? Please share! :)


Read More......

Monday, April 21, 2014

My own glitter polish: so much fun!!!

After seeing some franken polishes at Nagellack 2.0, I decided it would be fun to mix one myself. I ordered some glitter from Glitter Unique and had fun messing around in my living room.

I used an old base coat bottle, some clear polish from Essence and three metal balls (stainless steel balls from Ebay). I couldn't find any suspension base for a reasonable price with delivery to Germany, so if you know a supplier, please let me know!


I just mixed different types of glitters - without a system or plan. A what a fun it was! :)
Add some glitter - shake - check the result - add some glitter - shake - check the result, etc...
I started with half empty bottle - even less than half. I used a simple paper funnel to direct the glitter into the bottle, but it was still a bit of a glittery mess. So make sure you have a piece of paper to cover your table.


Since it was my first glitter polish, at some point I've added too much of everything :-D  So I had to add a lot of clear polish to make my polish fluid again ;). So be careful with the amount of glitter!

Without the suspension base the glitter settles down very fast, but a good shake and the topper can be used again. At least I had fun mixing it ;)


What do you think? Did you try to mix yourself? How did it go?
Read More......

Sunday, December 15, 2013

Galaxy Nails Tutorial

My galaxy mani was really popular with my friends and colleagues and I was asked more then once how I did it and if it takes very long to create such a manicure. It's pretty easy I'd say, and it takes maybe some 15-20 minutes max. if you already have your base color dry.


The colorful clouds are created by sponging first some white and than three different colors over the dark blue nails. I prefer to use tweezers and small pieces of  makeup sponge, but you can do it any way it's comfortable for you.
This is what I used:
Makeup sponge & tweezers
Dark blue: Essie's Midningt Cami
Black: A-England's Camelot
White: no-name old white polish
Bright blue: China Glaze Towel Boy Toy
Purple: Essence Break Through
Neon Pink: China Glaze Pool Party

For the stars I used Northern Lights Top Coat I got from US on Ebay. I can imagine China Glaze Fairy Dust would create the same effect, if applied sparingly.
Make sure your base color (dark blue) is dry before you start sponging and then sponge away!

Sponge on some black on the outer corners to create more depth in the skies.
Apply the glitter top coat around the nebula. Cover with top coat. You're done! :)

Read More......